If you are unfamiliar with XBMC, it provides a slick interface to connect to your TV, through which you can access all kinds of media stored on network hard disks. I tend to use mine fo viewing photos on my TV, and accessing centrally recorded TV programmes from my MYTHTV viewer. Anyway, whilst an XBOX + XBMC works well, it cannot play high definition content, not to mention the fact it looks a bit ugly, and the fan makes a lot of noise whilst running. So, when I saw Acer had recently released a tiny, cheap desktop (or 'Nettop') PC called the Aspire Revo, this looked like the perfect upgrade for my XBMC system.
I won't go into detail about the Revo's spec here - many other sites have that well covered already. I purchased mine from eBuyer in the UK - the linux version, with 1Gb RAM and 160Gb hard-drive, for the bargain price of £160 including free delivery. I then set to installing this with XBMC, which in the most part was very simple, but I did struggle to get the WLAN working. Therefore, I thought it might be useful to note my installation procedure here, in case anyone else can benefit from the experience.
Before we talk software, here are a couple of shots of the physical installation using the supplied mounting kit. Neat huh?

Right, now for how I went about installing this. Proceed as follows:
- Physically install the Revo - connect HDMI, power, keyboard, and in my case, a Windows MCE remote control USB IR adapter.
- Switch on the power, and hit DEL to get to the BIOS settings. Disable Revoboot as this is not required.
- Next, download XBMC Live custom build including the latest NVIDIA ION drivers following the instructions in item 3 of this post.
- I burned the ISO to a CD ROM, then plugged-in my USB CD drive to the Revo, inserted the CD, and rebooted.
- Hit F12 to get the Revo boot menu. Select the CD ROM and proceed.
- Follow the instructions to install XBMC Live to the hard disk - pretty straight forward. Then reboot.
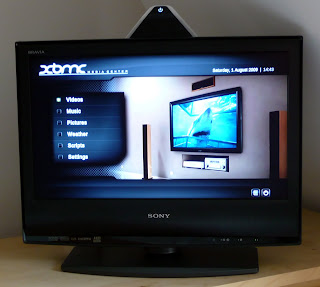
- After about 20 seconds of boot time, I was greeted with the familiar XBMC welcome screen. Remote control working right out of the box. Before configuring XBMC itself, some system-level tasks are required first.
- Since the WLAN does not work out of the box, I first install SSH from the command line by hitting CTRL+ALT+F2, logging in as XBMC user, and then typing: sudo apt-get install ssh
- If you like, you can continue to use this command line to complete the set-up, but I found the text was cropped by my Sony TV, so instead I plugged-in a network cable into my router, and SSH'd from my main desktop PC using PuTTY.
- Next, I performed a system update with sudo apt-get update and sudo apt-get upgrade. I then rebooted after this.
- Next, SSH back into the box and install more essential packages for the WLAN to work: sudo apt-get install ntp wpasupplicant wireless-tools. I included NTP so the Revo can keep accurate time.
- After another reboot, time to set-up the WLAN. My home network uses a hidden SSID which, to this day, I have not managed to get the Revo to connect to. Having now unhidden my SSID it works, so I still need to figure out how to get the Revo to connect to an unhidden network. Not urgent though. Additonally, I have WPA / WPA2 security enabled. First thing to do is sudo vi /etc/network/interfaces and make your file look just like mine:
# Used by ifup(8) and ifdown(8). See the interfaces(5) manpage or
# /usr/share/doc/ifupdown/examples for more information.
auto lo
iface lo inet loopback
auto eth0
iface eth0 inet dhcp
#iface eth0 inet static
#address 192.168.0.100
#netmask 255.255.255.0
#gateway 192.168.0.1
auto wlan0
iface wlan0 inet dhcp
pre-up wpa_supplicant -B -Dwext -iwlan0 -c/etc/wpa_supplicant.conf
post-down killall -q wpa_supplicant
- Next, you need to configure wpa_supplicant. Two pieces of information you need are: a) your SSID, and b) your WLAN password. In my example below, I will use your_essid
and your_ascii_key to replace my actual values used. A good reference for this part can be found here. First thing then is to get your HEX password by using the following command:
wpa_passphrase your_essid your_ascii_key
- Which will give you, as an example, this output in a terminal:
network={
ssid="test"
#psk="12345678"
psk=fe727aa8b64ac9b3f54c72432da14faed933ea511ecab1 5bbc6c52e7522f709a
}
Next, copy this, and then sudo vi /etc/wpa_supplicant.conf and make the file look like this:
ctrl_interface=/var/run/wpa_supplicant
ap_scan=1
network={
ssid="your_essid
proto=WPA RSN
key_mgmt=WPA-PSK
pairwise=CCMP TKIP
group=CCMP TKIP
#psk="your_ascii_key
psk=fe727aa8b64ac9b3f54c72432da14faed933ea511ecab1 5bbc6c52e7522f709a
}
- Save this file and you are ready to test the connection. If all has gone well, running the following command will confirm you can connect via WLAN now: sudo wpa_supplicant -iwlan0 -c/etc/wpa_supplicant.conf -Dwext -dd
- Hit CTRL-C to quit wpa_supplicant. You can now manually bring up the connection with sudo ifup wlan0, or just reboot.
And that's it for getting the WLAN working. The final base configuration required to ensure XBMC can play everything correctly is as follows:
- Go into XBMC's settings, and select the following:
- VIDEO: Setting > Video > Play:Set Render to - VDPAU
AUDIO: Settings > system > audio hardware > Audio output (digital) - DigitalAudio output device - plug:hdmi (if you just use hdmi here, your music files will play about 10% faster than they should!) - Passthrough output device - hdmi
- Downmix multichannel audio to stereo - ON
The rest of the XBMC configuration is up to you, but having done the above, you have a solid, fully working system to build on.
First impressions of the Revo are excellent, and it appears to be perfectly suited to the low-cost media centre application here. I hope this information was useful - thanks for reading.
Nick.


