Tuesday, March 27, 2012

Coming soon: Super-robust music server

I'm a huge fan of the Logitech's (or should I say Slimdevice's) range of Squeezebox players. I own three currently and use them every day to stream my entire CD library in high-quality FLAC format around my house. I absolutely love them.

Accordingly, I'm a long-term user of the Logitech Media Server software (nee. Squeezecenter, Slimserver) and have run this on all sorts of servers over the years, including a custom build PC server, a Buffalo Linkstation, and currently a Synology Diskstation. The Diskstation is brilliant - well supported, small, quiet, and efficient. However, with now over 1,000 CDs on the system, I've started to think about building a new super-robust server to protect my collection.

So, here's what I'm planning:

Hardware:
  • HP Proliant N40L Microserver. Currently £230 approx, with £100 cashback until the end of March. This is an absolute bargain in my opinion for a 4-bay, 2Gb RAM server including a 250Gb disk. I have mine currently on order from eBuyer (www.ebuyer.com).
  • Sony SATA DVD drive from which to install the OS.
  • 4Gb USB flash drive to install on the Microserver's internal USB port onto which to install the OS.
  • 1x WD 2TB hard disk. I have this spare from a previous project and will use this to start my RAID array. Once up and running, I plan to migrate other disks from my existing NAS to increase the capacity on this new server.
  • Total cost after cash-back: £149.00
Software:
  • I have been exploring the excellent FreeNAS 8.2 (www.freenas.org) and really want to use this for the following reasons: ZFS file system for fault-tolerance and error correction; regular filesystem snapshots; RAID 5; small & fast footprint; very quick to install, and good support.
  • Logitech Media Server (LMS) 7.7.1. This is the tricky bit as there is no official method that I can find to install this on BSD UNIX (on which FreeNAS is based). I've played around with this on Virtualbox and haven't found a way yet to install LMS yet. Herein lies the major challenge of this project!
I'm looking forward to putting this all together and if I can get LMS working on top of FreeNAS I'll let you know how I do it. Meanwhile if anyone has already achieved this please post a comment with some tips!

Thanks for reading,
Nick


Thursday, February 16, 2012

Convert UK (or other) Motorola Xoom to GED with Jelly Bean

** IMPORTANT EDIT 31/07/2012 **
If you have been patiently waiting for Jelly Bean to land on your GED Xoom, wait no more. You can force the upgrade by clearing the Google services framework via Settings - Apps - All - Google services framework - Clear data.

Having done this, go back to 'About Tablet' and hit the 'Check for updates' button and the latest update should appear. 4.1.1. This has worked for me today.

EDIT 24/07/2012: Confirmation that Jelly Bean is on its way for the Xoom - hopefully within the next week:
http://www.androidcentral.com/case-you-needed-confirmation-it-jelly-bean-will-be-arriving-xoom-wifi

EDIT 28/06/2012: With Google's announcement of Android 4.1 'Jelly Bean' yesterday, it appears that the Xoom will receive this update some time in July. I hope this will automatically appear on my ICS Xoom, so when it does I will post an update with details on the upgrade.

-->

I bought a Motorola Xoom last year and think it is superb. Living in the UK though I have been keen to obtain Ice Cream Sandwich (ICS) but rather disappointingly it hasn't officially been released yet. It turns out that the non-US Xooms are not officially 'Google Experience Devices' and so have some amount of customisation in their OS, making updates slower to emerge as a result. The US devices however have no such restrictions and are already able to upgrade to ICS.

The excellent Xoom forums have a good article posted on how to safely convert your Xoom to one running the stock US ROM, which you can then update to the latest release. I tried this the other day and am delighted with the results. Everything works - I still have access to the UK App Store (with prices in GBP) and the ICS experience is genuinely much slicker than Honeycomb. So, if you are impatient and wish to try this yourself, here is how I did it.


Firstly a warning:

  • THIS PROCEDURE WILL WIPE YOUR XOOM AND ALL DATA ON IT - BACK-UP NOW.
  • THIS PROCEDURE MAY STOP YOUR XOOM FROM WORKING PERMANENTLY.
  • THIS PROCEDURE WILL MOST LIKELY VOID YOUR WARRANTY.
  • FOR PRECAUTION CONNECT THE XOOM POWER SUPPLY DURING THIS PROCEDURE.

Still here? OK - I'll start with two pages for reference from which I derived this procedure:

http://developer.motorola.com/products/software/?pubid=987654

You will need to install the Android SDK on your PC / Mac / Linux box - see elsewhere in this blog for instructions for various Linux installations, or visit this page:

http://developer.android.com/sdk/index.html

Now for the procedure:

1. Connect Xoom to your computer via USB.
2. On the Xoom, go to Settings -> Applications -> Development -> Enable USB debugging - tick this.
3. Download MZ604_HWI69.zip from the Motorola Developer link above. You will need to register to access this file but this is a simple step. Unzip contents of MZ604_HWI69.zip into a folder. Move this folder into /Applications/eclipse/android-sdk-mac_x86/platform-tools/, or wherever this folder exists in your Android SDK on your hard disk. This last stage is very important you do correctly otherwise the commands below will not be able to find the ROM image files.
4. Now, open a terminal and execute the following (these examples were run on a Mac but should be the same for Linux. Windows users will need to adjust these to suit - see the Xoom Forums post for examples for Windows):

cd /Applications/eclipse/android-sdk-mac_x86/platform-tools

5. Check your PC is talking with the Xoom over USB with:

./adb devices

Which should return something like:

List of devices attached 
3848204958a394e5 device

6. Then start the procedure to flash the US ROM with:

./adb reboot bootloader

7. The Xoom reboots. When the Xoom screen shows "starting fastboot protocol support" now type in the terminal:

./fastboot oem unlock

8. Now use 'volume up / down' buttons on the Xoom to answer the displayed questions to accept the license. After some formatting, the device reboots. Now manually power off the Xoom and then, holding the 'volume down' button, power on again. You will enter fast boot again. Now in the terminal type:

./fastboot flash boot MZ604_HWI69/boot.img 
./fastboot flash system MZ604_HWI69/system.img 
./fastboot flash recovery MZ604_HWI69/recovery.img 
./fastboot flash userdata MZ604_HWI69/userdata.img 
./fastboot erase cache
./fastboot oem lock

9. Again, use the 'volume up / down' buttons to answer the questions. The Xoom now reboots into the US ROM. Once booted for the first time, start downloading all the system updates in the usual way. After 5 or 6 of these, your Xoom will eventually boot into ICS. That's it!


To return to UK version repeat the above using MZ604_H.6.2-24_Retail_Europe.zip (N.B. I have not tried this - I plan to keep my Xoom in it's GED guise and hope it receives Android Jelly Bean later this year)!

I hope this works for you. Good luck if you do try, and thanks for reading.

Sunday, August 21, 2011

Top Gear meets a camera store in Hong Kong

I've always been into cameras, and in the last couple of years have got quite seriously into photography. Recently I've bought a few bits of new kit and found on-line reviews a great help in choosing the right compromise. Better still are the video reviews where camera experts actually demonstrate the kit in the real world, and in my searches no-one does these better than DigitalRev TV.

From what I can fathom, DigitalRev are a Hong Kong based camera shop serving primarily the UK market. However, their web site not only sells you kit, but it also hosts tips & review reviews in both written and video form. The videos for me are pure entertainment, with the host Kai Wong (who appears to be of Hong Kong origin, but must have spent some impressionable years in the UK) doing for cameras what Jeremy Clarkson does for cars. His videos are very well made - can be a tad crude at times - but generally are great fun and very informative.

I bought an Olympus E-PL1 camera and Billingham Hadley camera bag on Kai's recommendation and love both items. Kai is an interesting character - Leica & Nikon loving, but usually often seen testing Canon gear. He's always inventing unusual ways to test lens 'bokeh' and does a great take-off of your stereotypical British paparazzi. His latest video is a good example of the formula - actually, this is a self-take off - gently mocking Kai's much more traditional predecessor on the DigitalRev TV channel. If you're into cameras, and enjoy a 'Top Gear' style sense of humour, then I recommend you check out DigitalRev TV.


Thanks for reading, and happy shooting!
Nick

Sunday, August 7, 2011

The marvellous Mac.

I briefly blogged a while back that I'd taken the plunge and purchased a new Macbook Pro (13" i5 Thunderbolt). I've set this up as a desktop replacement, connecting it to my existing Samsung LCD monitor, giving me a 2-screen set-up, perfect for photo editing which is my main use for it. Having lived with this for a few months now (and recently upgrading to Lion), I can confirm it is everything I hoped it would be.

For a long while I've wanted to break free from Windows but have never found a satisfactory alternative in Linux. Nice as many distributions are (especially my favourite, Fedora), they all have one fundamental flaw - lack of support for commercial desktop apps. I wish to use MS Office, Photoshop, and iTunes - all of which just do not exist on Linux (although, of course, similar alternatives are available). Having tried hard to migrate to these alternatives, they simply do not give me the functionality I want. As such, I had 2 choices: stick with Windows, or 'Think Different' with a Mac.


So, how have I found the Mac? It's not perfect, but it's pretty damn close, and to be honest, it's by far the best computing experience I've ever had. Here are the pros and cons as I see them:

Cons:
  • Despite the powerful processor and large memory, apps still tend to 'hang' more often than I'd like, exhibiting the spinning beach ball pointer while they think about what to do next. What's that all about?
  • The hardware is somewhat expensive compared to equivalently specified Windows laptops.
  • Hmm, I can't think of any more cons!

Pros:
  • The hardware, despite it's price, is absolutely exquisite. The aluminium unibody detail is wonderful - having a solid base with no fans to suck the fluff from your trousers means you can properly use it on your lap without fear of gunging up the internals.
  • Wonderful screen.
  • Very quiet most of the time - silent hard disk, very quiet fan, and no flashing activity lights. Fan does get noisy when the processor is working hard however.
  • Great backlit keyboard, although the flat keys take a little while to get used to.
  • Appstore - borrowing heavily from Linux repositories as a way of distributing software, I have to say this is such a good system. Being able to purchase high quality apps and install them almost instantly is just better.
  • Support for commercial apps on a Unix-based system is great - MS Office is very smart on the Mac, and I have since moved from Photoshop to Aperture which is simply a joy to use.
  • System updates are handled in a smooth and unobtrusive way, similar to Linux. No longer do I have to suffer Window's insistence that, before you can get any work done, you must spend half a hour installing updates.
I've always been dismissive of Macs as expensive form-over-function devices, although I have always admired OSX since it's release. Whilst they do cost more, I genuinely believe you get value for money especially with such a high quality of build. I can't see myself replacing the hardware for many years, and with OS upgrades for only £20, and apps cheaper via the appstore, the running costs feel less than Windows.

So, I'm very happy to kiss goodbye to Windows. I also bid a fond farewell to Linux desktops (although I will still run some form of Linux on my netbook - currently Fedora 15). If you too are trying to break free from Microsoft's finest, and Linux just isn't delivering, then save-up and buy a Mac - you'll love it.

Thanks for reading, Nick

Monday, July 11, 2011

Note to self: coming soon!

Long-overdue blog updates coming, featuring:

  • Mac OS X vs Linux - which is my favourite Windows alternative and why?
  • Fedora 15 - in my mind the best Linux desktop out there.
  • Cars: The Goodwood Festival of Speed
  • Google +
  • Chromebooks
  • Photos & cameras, including my new quirky favourite: Olympus EPL-1 fitted with a Lumix 20mm F1.7 'pancake' lens.
  • More music lists.
  • Possibly some work-related talk.

Come on then Nick - warm-up those fingers.

Monday, February 28, 2011

Irresistible Apple

I've finally been sucked-in to the hype and can resist the shininess no more. Last week I ordered my first Apple Mac - a brand new i5-powered Macbook Pro 13". It's the base-level machine only with the HDD expanded from 320 to 500Gb:


This left the factory in China today according to UPS - once it arrives I may post some comments on how it runs. Next stop Germany by the looks of it. Handle with care please UPS!


Nick

Monday, January 17, 2011

Linux Mint Debian Edition - a green goddess

Still on the hunt for the ultimate netbook Linux distribution, I recently discovered a great new project by the Linux Mint team. Until recently they have focussed on re-packaging Ubuntu Linux into a more attractive desktop distribution. Recently though, they have launched a project which, like Ubuntu itself, is now based directly on Debian. However, unlike Ubuntu, Linux Mint Debian Edtion (LMDE) is based on Debian's 'testing' branch, which means that instead of having a periodical release schedule, new updates are added all the time. In theory then, you install LMDE once, and once only. Just run online update to keep up with the latest developments.

So the rolling release philosophy, along with Mint's exquisite design and artwork, for me combine into a very interesting project. I've just installed it onto my HP Mini 110 netbook and can confirm it works a treat. It takes a little more effort to set-up than, say, Ubuntu, but in theory I should never have to re-install, and the pay-off is to enjoy the Mint team's wonderful attention to detail. Below are some screenshots, plus my installation notes in case anyone else wants to try this on the HP Mini, or similar netbook.

Screenshots:
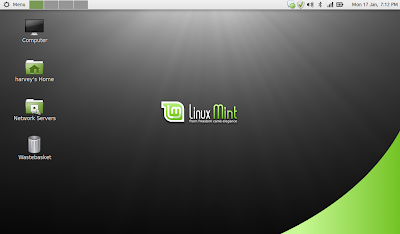
The standard desktop, with my own minor customisations for my netbook.

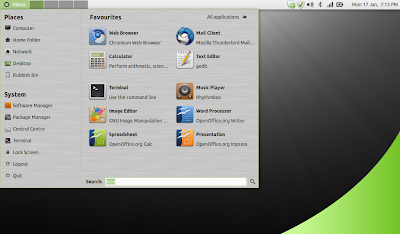
Mint uses a custom 'start' menu which is extremely functional and very attractive. The best I've used in any distribution.

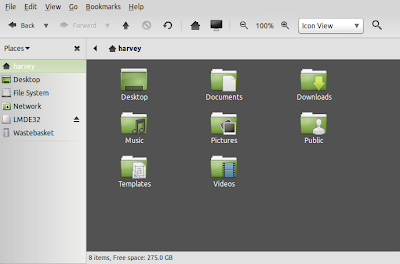
Mint's theme applied to the standard Gnome file browser.

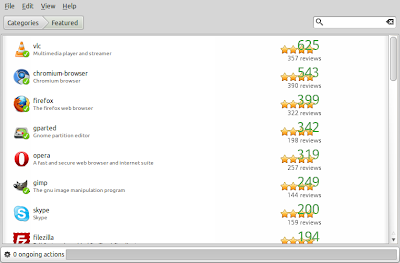
Mint's software centre for finding and installing apps.

Installation notes:
These notes are for my installation onto the HP Mini 110 based on my own needs. This is not an exhaustive guide, but I've tried to include as much detail as possible:

Setting up an SD card with 32 bit Mint Debian DVD for installation:
Format a 2Gb or larger SD card with FAT32 on Windows.

Download the 32 bit DVD .iso from the Mint web site (http://www.linuxmint.com/edition.php?id=66) and install to SD card using Windows UNetbootin (download from http://unetbootin.sourceforge.net/). I used the 'Mint 9 Live' preset.

Installation:
Connect wired LAN cable (needed to install wireless driver).
Insert SD card into netbook and switch on.
Press 'F9' on BIOS screen to select boot from SD card.
At UNetbootin boot menu, select 'Default'
Boot to the live desktop, then install system using the standard installer with the following options:

Computer name: hp-mini-110
Install GRUB on /dev/sda

When prompted. re-boot into the new desktop, install all updates, & reboot once more.


Fix missing wireless:
Install propriatary Broadcom driver thus:

In a terminal, type:
sudo aptitude update
sudo aptitude install module-assistant wireless-tools
sudo m-a a-i broadcom-sta

sudo vi /etc/modprobe.d/broadcom-sta-common.conf
Append the file with the following:
blacklist brcm80211

sudo update-initramfs -u -k $(uname -r)
sudo modprobe -r b44 b43 b43legacy ssb brcm80211
sudo modprobe wl
sudo iwconfig

Then reboot, disconnect your wired LAN cable, and configure wireless using Gnome Network Manager.


Install some essential apps:
Install using Software Manager or via terminal:
sudo apt-get install chromium-browser ttf-mscorefonts-installer gnome-alsamixer


Disable PC speaker (to stop an annoying buzz on boot and shut-down):
Launch Gnome Alsa Mixer, and mute the PC Speaker.


Desktop settings:
Desktop Settings -> Change button layout to 'Left - Mac like'.
Change panel from bottom to top.
Remove 'show desktop' icon from panel and replace with 'workspace switcher'.

Add Computer, Home, Network, and Trash icons to right-hand side of desktop using Desktop Settings. Untick Mounted Volumes.


Enable Compiz
Add the following Gnome startup entry:

Name: Compiz
Command: compiz --replace
Description: Start compositing manager

Reboot to enable Compiz, then In CCSM select:
General Options -> Focus & Raise Behaviour: Untick 'click to focus'. Tick 'auto-raise'.
Enable Application Switcher
Enable Minimize Effect
Move Window -> Change opactity to 75%
Enable Desktop Cube and Rotate Cube (needed to enable multiple desktops, otherwise you are stuck on just 1)
Desktop Cube -> Change cube colour to black (to remove blue cube top & bottom)
Rotate Cube -> Transparent Cube -> 'opacity during rotation' = 50%


Configure Power Management:
On AC Power:
Put computer to sleep: Never
When laptop lid is closed: Shutdown
Never spin down disks
Put display to sleep: 30 minutes

On Battery Power:
Put computer to sleep: 10 minutes
When laptop lid is closed: Shutdown
When laptop power is critically low: Suspend
Do spin down disks
Put display to sleep: 5 minutes
Do reduce backlight brightness

General:
Keep default settings


Configure Firewall and allow browsing Samba shares on Windows PCs, etc:
In a terminal type:
sudo vi /etc/default/ufw

then change:
IPT_MODULES="nf_conntrack_ftp nf_nat_ftp nf_conntrack_irc nf_nat_irc"

to:
IPT_MODULES="nf_conntrack_ftp nf_nat_ftp nf_conntrack_irc nf_nat_irc nf_conntrack_netbios_ns"

Save and exit vi, then in a terminal type:
sudo ufw enable
sudo reboot

And that's about it. I hope I've inspired you to try this interesting new distribution - I'm certainly hoping to keep it on my netbook in the long term.

Thanks for reading,
Nick